Pages

Monday, May 28, 2012

Heirloom Tomato and Basil Marinated Burrata

Heirloom Tomato and Basil Marinated Burrata
I absolutely love fresh and vibrant flavors, and colorful and lively food on a plate. So, what better way to spend a relaxing spring evening at home than with a beautiful plate of fresh burrata with baby heriloom tomato's and a Semifreddi's fresh baguette? Just add a chilled bottle of Francis Coppola Sofia Rose, a cozy spot on the couch, my pup and some good movies and it's going to be a fantastic night!

For this simple dish, I spiced it up just a wee-bit by toasting some fennel seed and then crushing it, to add to the marinade. I chopped some baby heirloom tomato's, minced some garlic, and chiffonaded some fresh basil. Tossed all that in a bowl with a light coating of extra virgin olive oil, salt and pepper, and let marinade for a bit. Gently cracked open the fresh burrata cheese and laid it out onto a plate. Then drizzled the tomato basil mixture onto the burrata, and sprinkled with fresh cracked pepper and lemon zest, and let that sit for about 30 minutes.

Slice up a french baguette, pour a glass of vino, press play on the remote, and... Cheers!

Thursday, May 17, 2012

Empire State of Empanadas


I was in an empire state of empanadas recently. It was a few weeks ago, so yes, I am doing some catching up on my postings here. I was offered an assignment, to make 140 empanadas for a woman's 50th birthday party on Cinco de Mayo. And I gladly accepted the mission.

The details of my mission were simple. Make 70 pulled pork empanadas, and 70 black bean and corn empanadas. Yet, the actual work of completing these little pockets of goodness were not so simple. It was a time consuming process. So let's quickly get started on this review of my mission a la empanada madness....

The first thing I did after getting home with all of the needed ingredients, was to get the pork and its braising liquid prepared. I seared the pork to give the outside some color and flavor, and sauteed some onions and garlic. Then all the braising ingredients got tossed together in one large container...
dried chiles, oranges, onions, garlic, bay leaf, cinnamon stick, salt and pepper.
...then covered with chicken stock, and covered with foil, and placed in the oven for a good four hours.

While the pork was cooking, I put together the black bean and corn filling...
black beans, corn, diced tomato, onion, garlic, jack cheese, fresh cilantro, chili powder, cumin, salt, pepper.
Next, it was time to get started on the dough. Ohhh, the dough!! I used the same recipe that I used when I made empanadas in school. I was so proud of that dough as it came out beautiful, so I was hoping for the same results this time around.

I threw together the ingredients, and worked it up with my fingertips in the bowl. I remembered that the dough is supposed to be of "pea size" lumps, so it was looking good...
Then dumped the mix out onto a lightly floured work surface and formed into a ball...
The dough rested for 30 minutes, then it was ready to be rolled out...
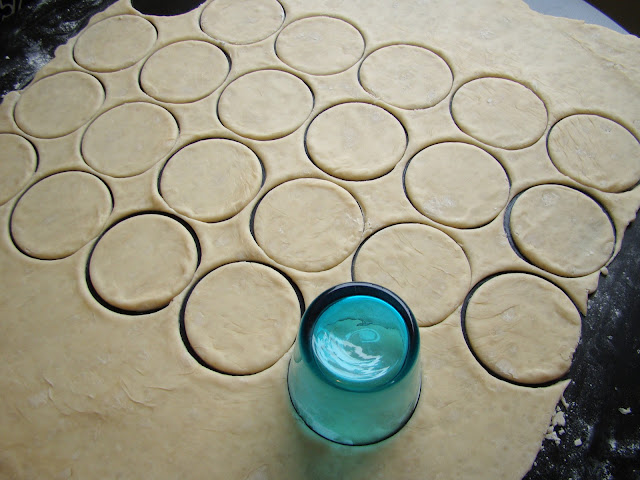
And cut into small rounds...
I think I did all of this three or four times. I lost count. I needed a lot of dough, and I had to consider the size of my containers. So I just put my head down and focused. I became a dough making machine!

Then it was time for the filling and stuffing, folding and pinching, coating with egg wash, and finally baking! I did a few of the veggie ones first as a test batch...
And once those came out of the oven, nicely browned, perfectly delicious and melty in the center, I knew I was good to go on the whole lot. After making over 70 of the veggie ones, I moved on to the pulled pork...
I was pretty thrilled to finally get down to the very last batch, filling the dough and folding each one over into a half moon. Pinching the ends together gently but assertive. Laying the soft pillowy shapes down, and sealing the ends together with the twines of my fork. And lastly, brushing on the egg wash, and sliding the tray into the oven. Timer set for 15 minutes. Go!
Once they were all out of the oven, counted, and cooled, they were carefully laid to rest, side by side, like sardines in a can, so that they could travel easily to their final destination...
I chose to also make a fresh salsa verde as a dip, or dressing. Because I just can't seem to be happy with simply putting these on the plate alone. I mean, they are so much more than just some browned baked thing on a plate. They deserved to be dressed for the party too!

Tuesday, May 15, 2012

Banana-Fana-Fo-Fana Chewy Cookies

A friend of mine was recently in a local play of Annie, and we were lucky enough to get tickets for the family night showing. And it wasn't just my friend that we were so excited to see on stage, his dog was also in the show, acting as "Sandy". It was pretty hilarious watching the dog, Spencer, as at first he was so nervous with his tail between his legs, slightly quivering, and backside towards the audience, all until "dad" came out onto stage. Then he would suddenly whip his tail up and over his back, and a big doggie smile came across his face. Pretty adorable. Oh, and our friend was fantastic too! :)

For such the occasion, as I had some extra time on my hands before heading down the Penninsula to the show, I decided I wanted to bake a little something sweet for our stars. I looked around my kitchen and found that I had some very ripe banana's, and all the fixin's for cookies. So I decided on banana cookies. I found a good looking recipe online here. I followed the recipe pretty exactly, except that I think I used all spice in place of the cinnamon/nutmeg/clove. I also added brown sugar, by reducing the white sugar by half and adding the remainder in brown sugar. And I used walnuts, as that is what I had on hand.

I whipped the batter together, and got them baking...
They came out of the oven smelling delightful, just like a banana bread does. And these cookies very much reminded me of banana bread. They are soft, pillowy, and chewy, with great nana flavor. But I thought that these nana-cookies needed a little extra oomph. I whipped up a vanilla icing to drizzle on top...
mmm....Whoop, there it is!

Monday, May 7, 2012

Chocolate Malted Cupcakes

Chocolate Malted Cupcakes
Mmmmm... Chocolate... Malted... Cupcakes....

I had the chance to do some more birthday time baking recently, so I jumped at the chance to bake a batch of these beautiful little babies. I had made these once before, sometime last year, and didn't get the chance to do a photo shoot with them, so this time, I made sure that we got some quality time in front of the camera.

It was a perfect Saturday morning, I woke to the excitement of making it a baking kind of day. I put some coffee on, and gathered all my ingredients...
I quickly got to work, this time, I used this recipe from The Culinary Chronicles. I found it to be a perfect recipe, my only changes were that I did not add the crushed malted milk balls to the batter, (because I did not want crunchy bits in my cake), and I did not use coffee in my buttercream frosting.

Before and after...

Once I had the batter done and the last batch in the oven, I got to work on the buttercream frosting. I was a bit nervous about doing a buttercream, because I have had some not so great luck with buttercream before. And my last experience with buttercream was when a former classmate called me in a panic asking how to save his buttercream frosting, as it wasn't quite thick enough. I didn't know what to tell him on the spot, in fear of giving him wrong information and making his situation worse. I quickly did a Google search for him and found that if he chills the frosting, that should thicken it up. He ended up freezing the frosting and it never came back to life. I sort of knew that it wasn't save-able, when he told me that he added melted butter to it. I told him to toss that batch and start over, but he was out of ingredients. Adding melted butter will destroy a buttercream. It will make it too runny and it will not come back to proper consistency. That is my belief anyway. So if you think that using melted butter to save time on bringing your butter to room temp, think again.

And never use just butter for your buttercream frosting, as it will be very unstable. Using half shortening and half butter will make it much more stable. However, if it is a hot day, or it will be outside for a long period of time, use all shortening, forget about using any butter. Using butter makes any buttercream very unstable, as the butter will obviously begin to melt.

I was so incredibly happy, ecstatic, pleased, thrilled, tripping the light fantastic, that my buttercream came out wonderfully perfect. Hooray! Rocky even came by to witness such an exciting event...
Ok so now that we have the buttercream whipped to perfection, it is time for some quality control testing, phase 1, initiate now....
Pass!

And now that all my pieces to the Chocolate Malted Cupcake puzzle are in order, it was time for my favorite part, putting the pieces together to form a perfect little package...
Soooo purty...
and absolutely delicious...